3D Photos in Product Photography
A DIY turntable for product photography that allows you to take photos from any cameras and mobile phones.
With the growth of online commerce, many try to attract attention to their products, and I was no exception. The simplest and most understandable way for a buyer to examine a product is to visit the nearest store and hold the product in their hands. 360 photos help show the product to customers on the website in all its glory. Many online stores (marketplaces like OZON and WILDBERRIES) even offer the option to upload sequences that display such photos in the product card, where users can rotate and spin your product as they like.
While preparing materials for a children’s furniture sales website, I wanted to organize product display so visitors could examine the furniture from different angles by rotating it. This idea prompted me to create a device for “360 photos” from improvised materials.
To capture such images, a turntable for product photography is needed. These tables are equipped with electronics for automatic rotation and camera shutter triggering while the table rotates.
The controller managing the table takes pictures based on settings, usually choosing 36 or 48 frames in the sequence. The more frames, the smoother the motion. But this depends on the controller’s configuration. We’ll talk about it later, but for now, let’s move on to designing and drawing the turntable for volumetric photography.
Example 360 photos taken with a phone on this homemade turntable
- To start the 3D photo, just click on the image
- You can rotate the image in different directions at various speeds
360 photography of equipment - img3d_00001.jpg
Sequence of 36 frames
So, let’s begin
After a short reflection, I began searching for components for the assembly.
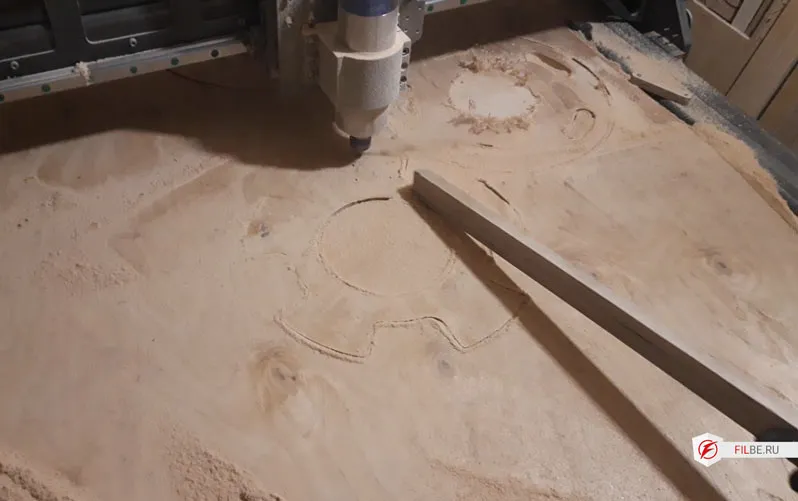
The choice of design and dimensions was determined by the availability of components and materials for making the product photography turntable, as well as my homemade CNC milling machine which would produce the parts.
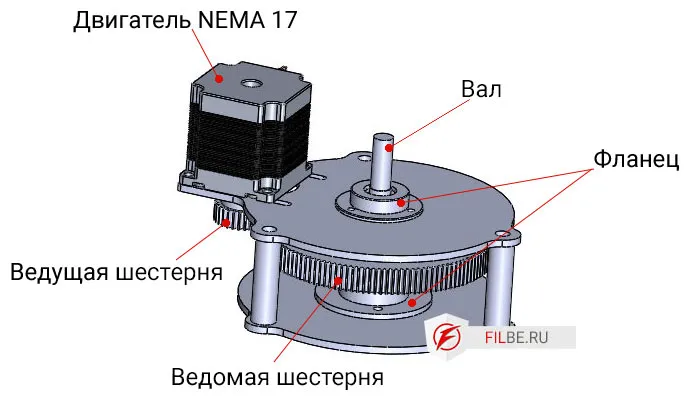
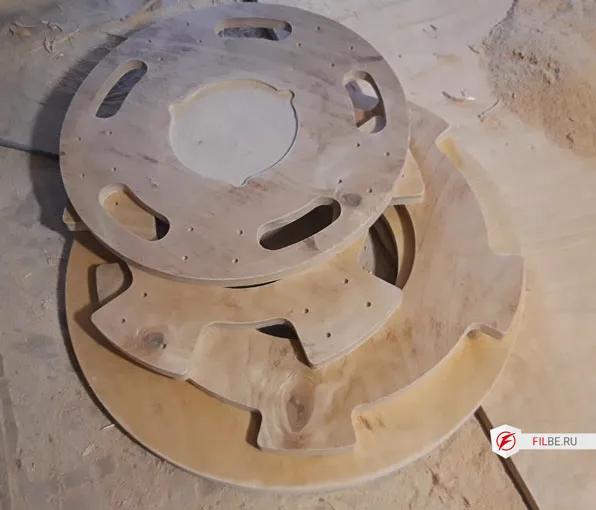
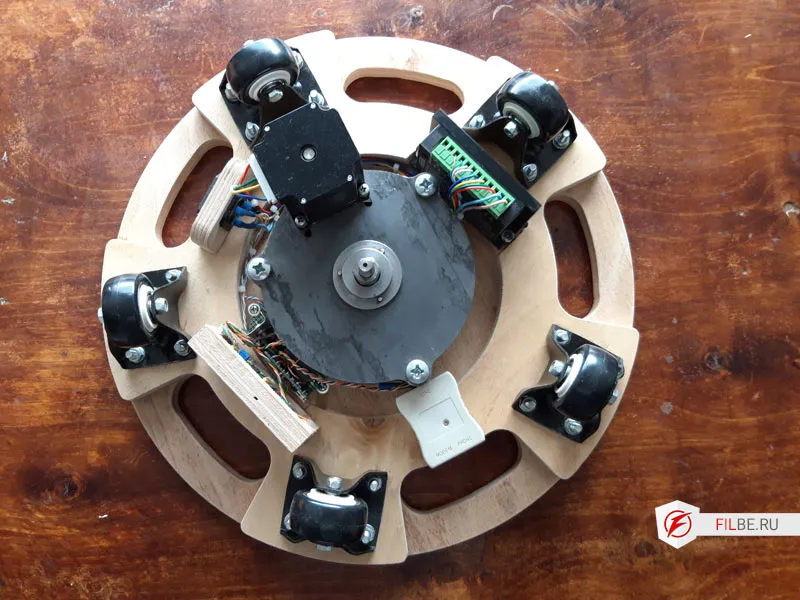
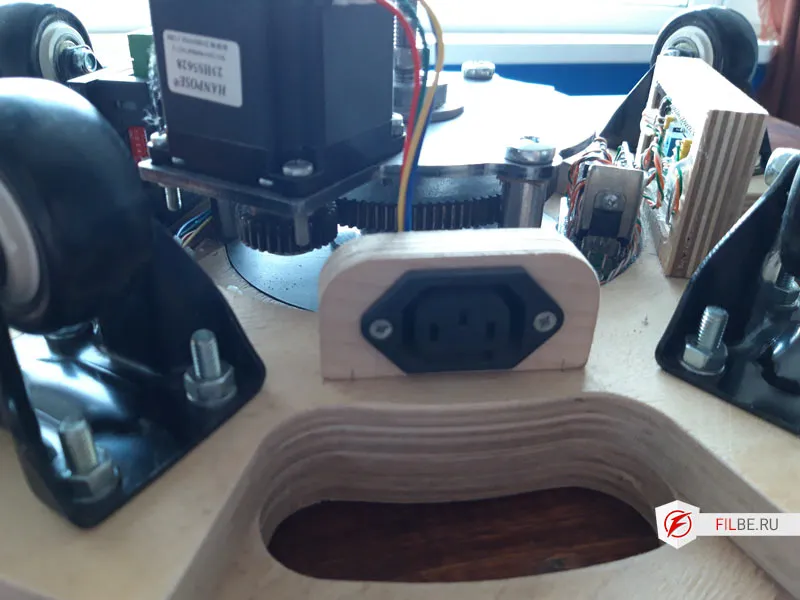
Available were driving and driven gears, a NEMA 17 stepper motor, and 15mm plywood sheets. These determined the reducer design and influenced the overall dimensions of the table.
Reducer
Because the gears were metal and the reducer was quite strong, I decided to build a universal table sturdy enough for anything it could handle. My intention was to conduct photoshoots at a furniture factory for sofas, chairs, beds, and so on.
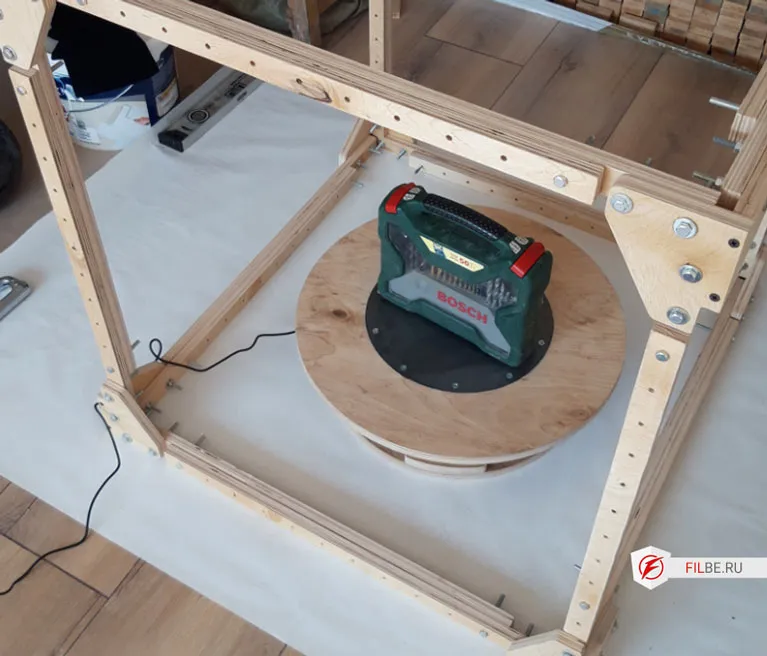
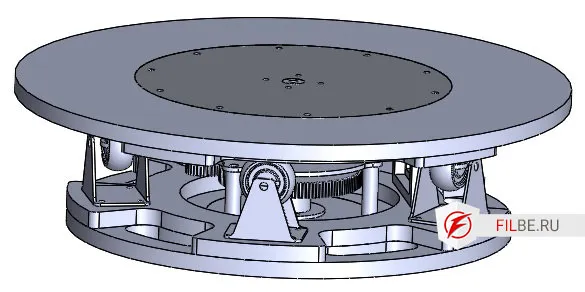
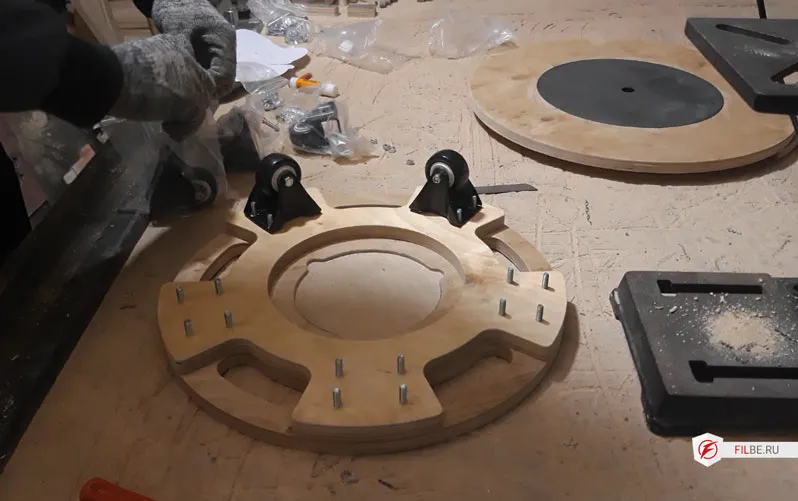
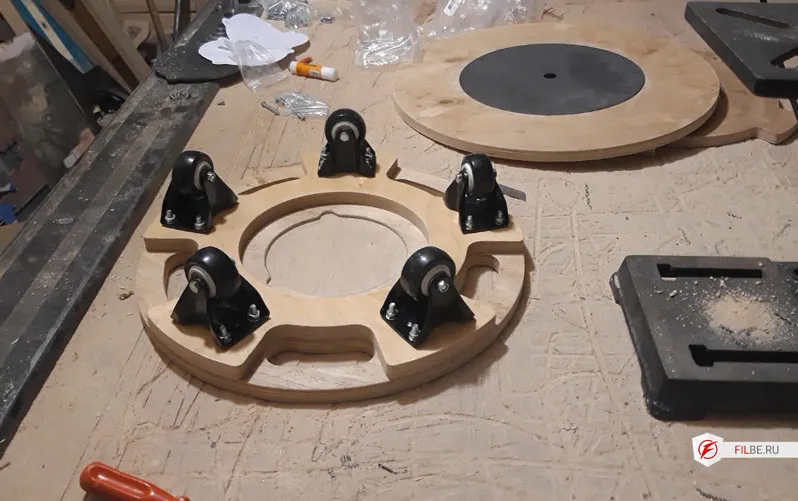
Table
To place furniture on the table, I had to decide on bearings on which the photographed item would rotate. I used regular wheels from a hardware store, each with a load capacity over 50 kg.
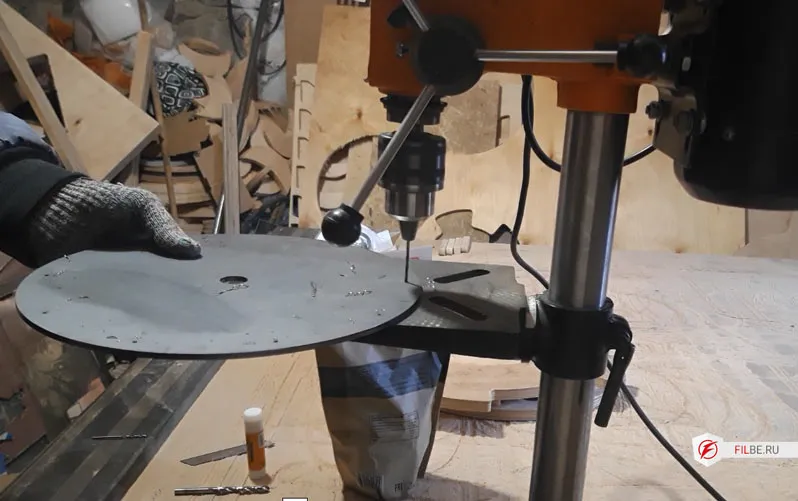
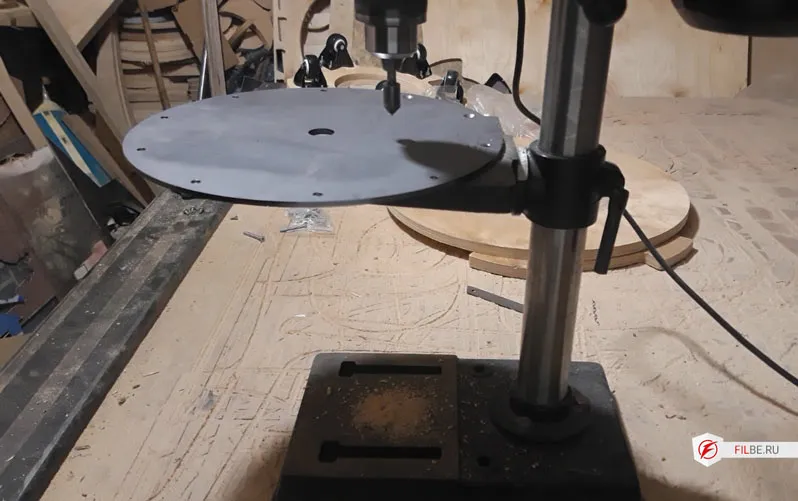
After selecting the main parts for the product photography table, I took on the design—or in this case, drawing the table. It took me two days to complete all the parts for the product photography table. Some parts were sent for laser cutting after preparing DXF files, some went to the lathe, and I made the plywood parts myself on my machine.
Cutting – manufacturing parts from plywood
The plywood parts (15mm thick) were cut with a 6mm milling cutter in one pass.
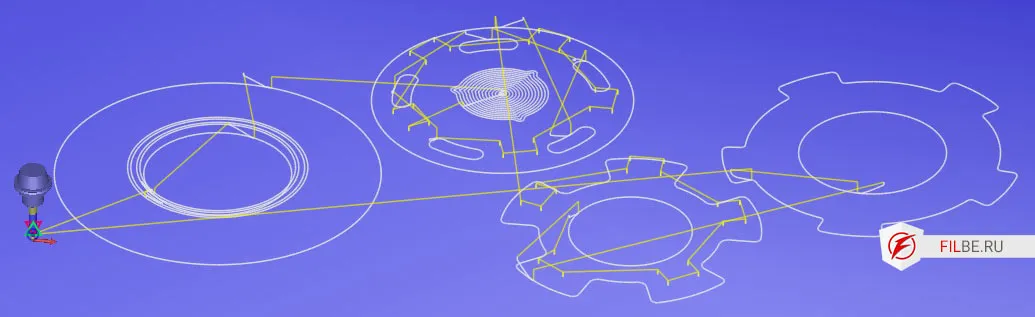
I milled the seating places for the reducer and the table’s top plate.
Assembly of the product photography table
Assembly took several hours.
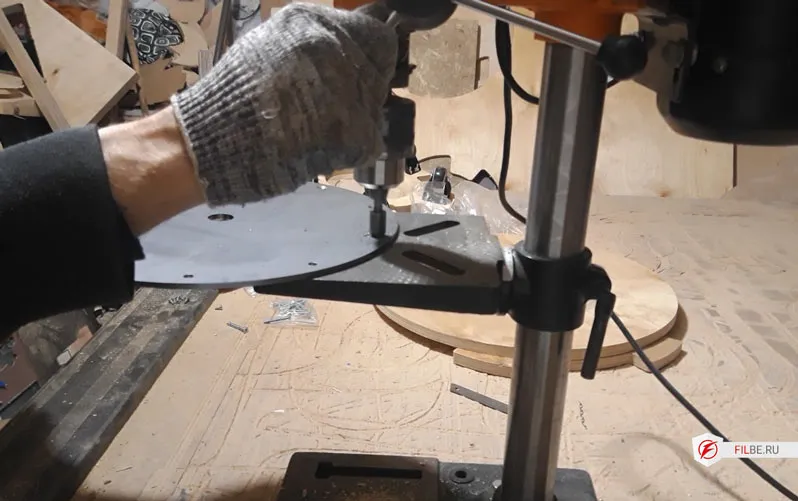
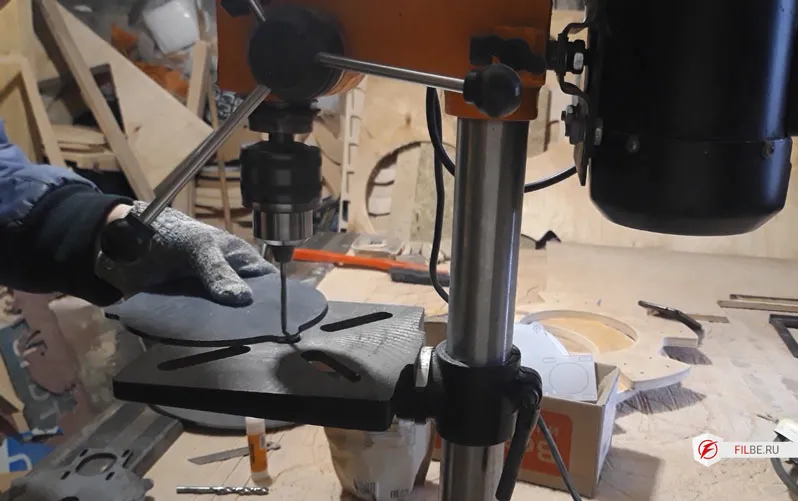
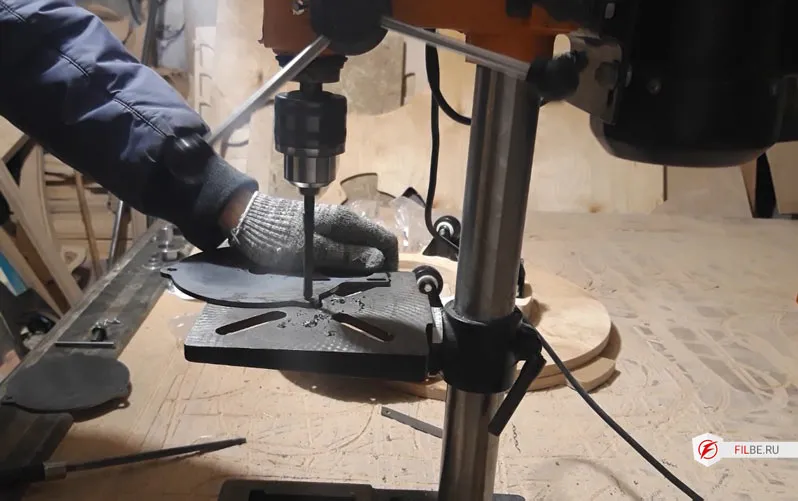
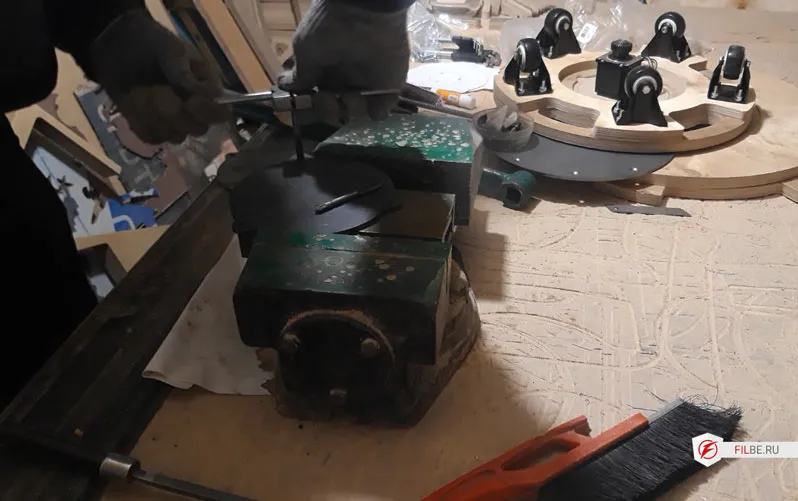
First, I prepared the plywood parts, drilled holes, installed the wheels, and moved on to processing the metal parts.
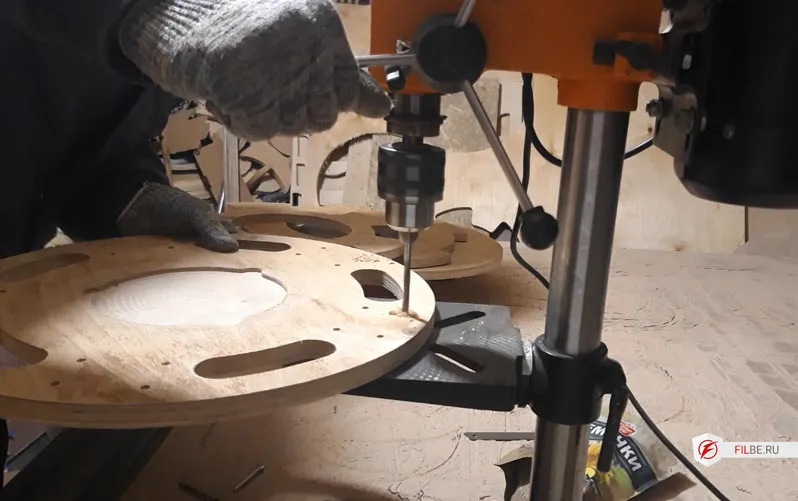
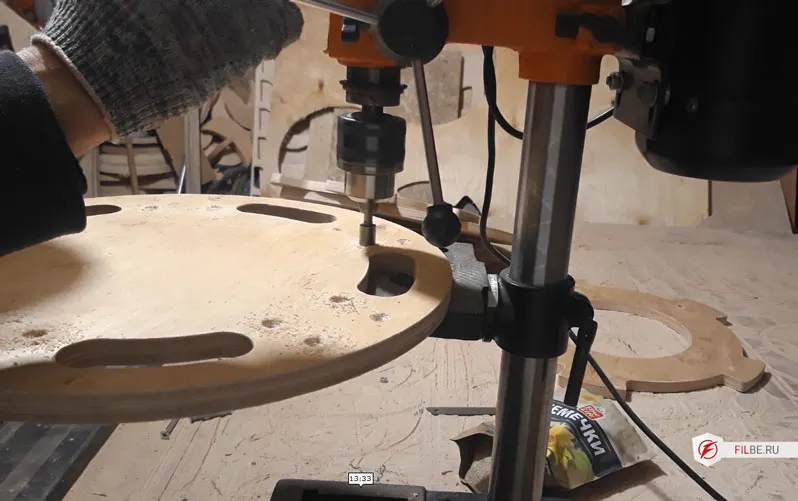
On the blanks received after laser cutting, holes were drilled, threads cut, and flanges with bearings installed.
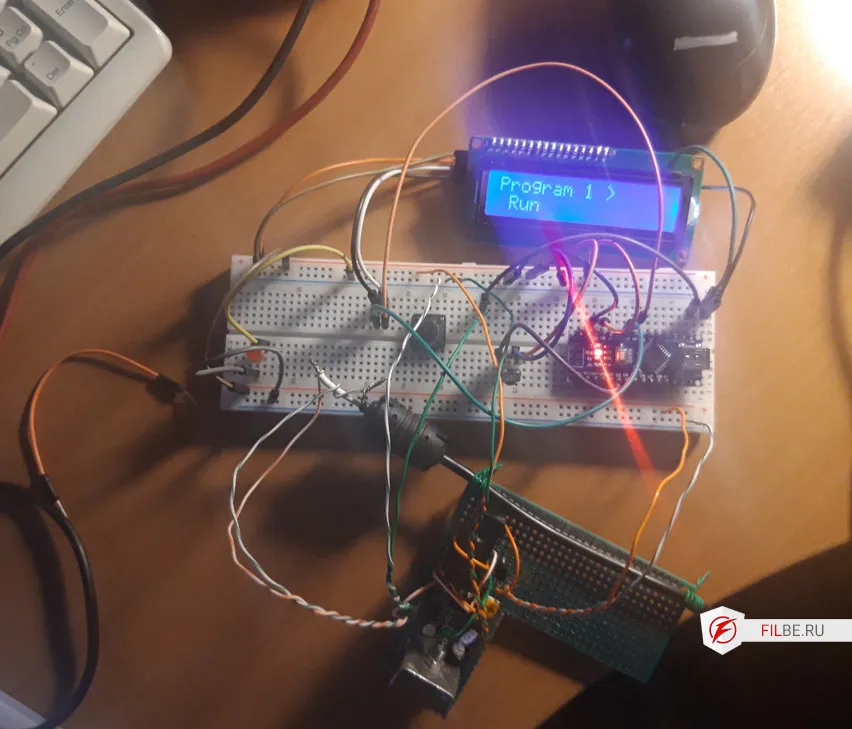
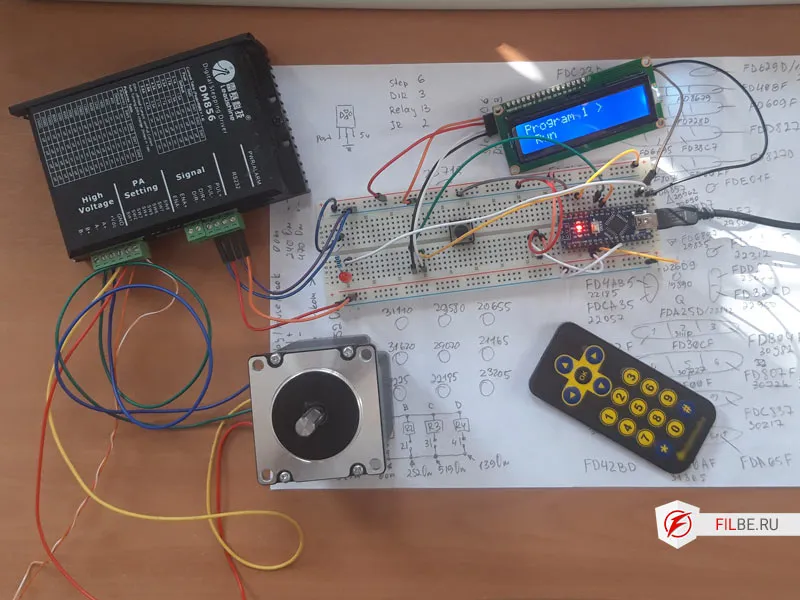
Automation for the turntable
The heart of the product photography table: Arduino Nano
Long ago I bought a beginner’s Arduino kit, and I used the main controller parts from there: the Arduino board itself, an IR receiver, and a remote. The power supply was taken from an unknown 12V device.
To avoid frying the Arduino on a breadboard, I built a 5V voltage regulator and a simple circuit with three components to control the shutter of a smartphone camera or a regular camera.
Conclusion
The result was a universal product photography table.
You can place anything on it; the shape of the plywood elements is made to connect with other segments that increase the table’s diameter and allow shooting larger objects.

Next, I made a lightbox for shooting, again using plywood.
The light cube is adjustable, which is very convenient in a small room.