Phantom Power for a Condenser Microphone
The requirements of YouTube listeners have reached the standards of television, and as everyone knows, it is impossible to listen to distorted, noisy, unpleasant sound. You can close your eyes to the video, but without good sound, you won’t get far. I realized this after trying to record with an old electret microphone. As it turned out later, the problem wasn’t the microphone itself. :)
Anyway, after reading through the internet, I realized that I urgently needed a microphone for my makeshift studio. And of course, yes, the choice fell on a condenser microphone. The first thing I did was check the price of mid-quality condenser microphones. After browsing through nearby music-focused websites, a budget of 7-10 thousand rubles seemed unreasonable, and I thought, “Why not just build a super-quality studio microphone myself?” YES, I would even make the capsule if I had the tools. :)
You guessed it, I turned to AliExpress to look for a capsule. After some searching, I found a ready-made circuit for a well-known and reliable condenser microphone model, the Rode NT1-A.
After doing the math, my transistor calculator told me to prepare around 2,000 rubles for the parts, with about 80% of that being the Chinese capsule. Well, I thought, at least I’d have a legit condenser microphone with studio quality.
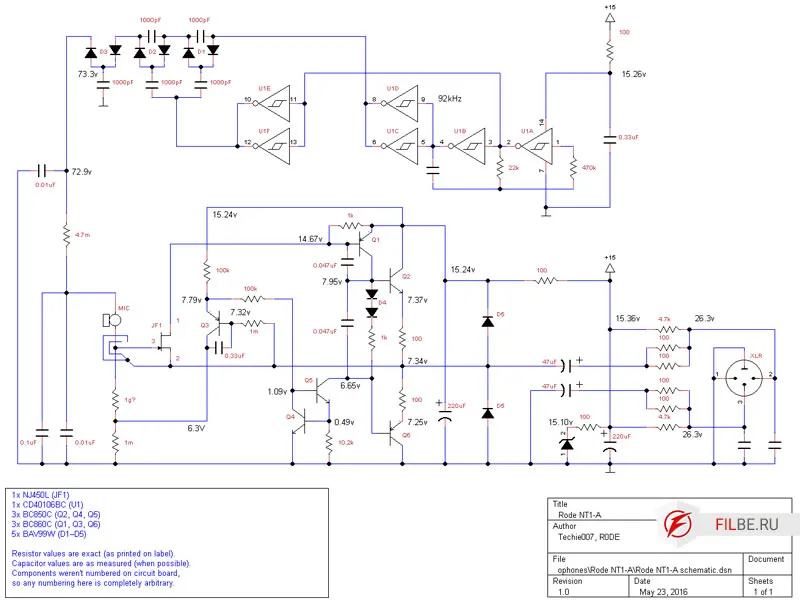
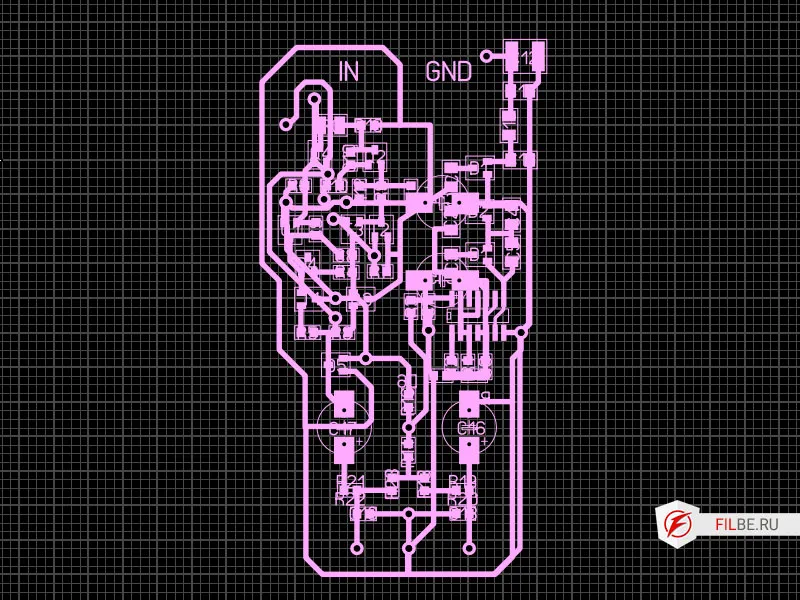
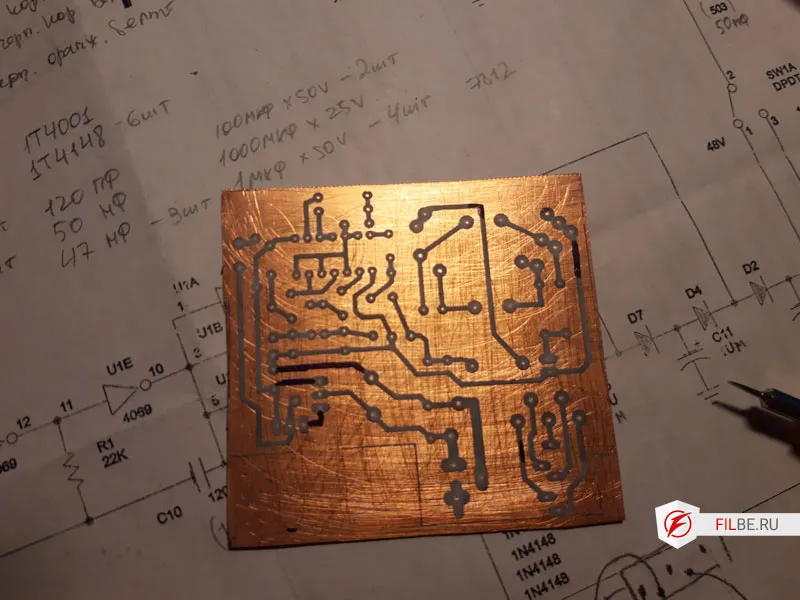
After starting to save money for the precious capsule, I began designing the board from the image I found online. I spent two days drawing out the schematic and another day creating the layout for the secret LTK (Laser Toner Transfer) method, developed by Russian scientists in the late 20th century.
While I was drawing out the schematic, I was also checking YouTube, where people were showing off their microphones worth 1,000 bucks. Then I saw it – a Chinese microphone, the Alctron MC410, for 4,500 rubles.
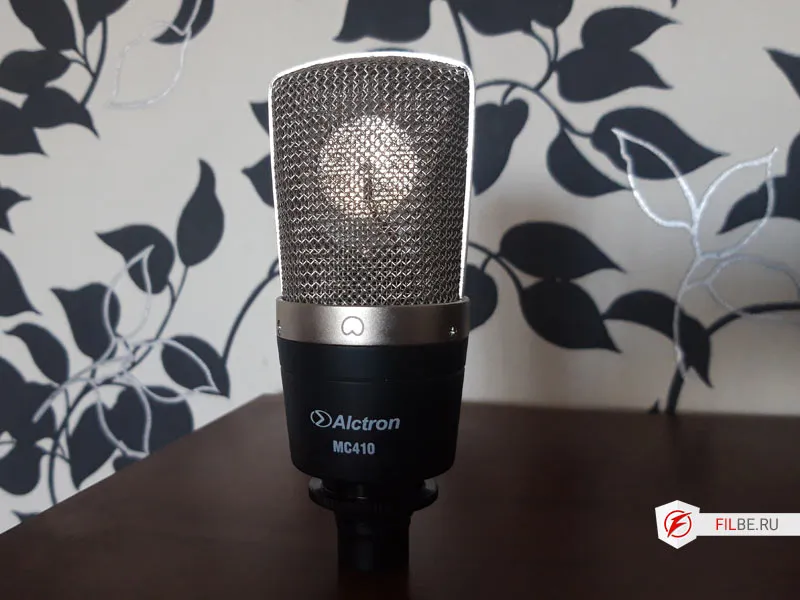
In a flash of insight, I thought, “Why bother with this DIY project? I’d still need a casing and an XLR connector.” After browsing the Alctron MC410 manual, it seemed like the capsule was the same one I was planning to order, although the microphone’s circuit wasn’t as good – based on the reviews from people who compared microphones built with the same schematic I was designing. So, I ordered the microphone and started thinking about where to get the phantom power.
Phantom Power for the 48V Condenser Microphone
First, I turned to YouTube, where everyone was shouting about audio interfaces – external sound cards, just like me, “specialists.” I spent quite some time selecting the best free interface, and eventually settled on the Behringer UMC HD204 because it allowed me to add background music (if I’m not mistaken) from the computer to the microphone and connect a second mic. I’m not a musician, and things like MIDI keyboards or guitars didn’t interest me. However, the Behringer UMC HD204 was priced at 7,500 rubles at the time.
And what do you think, my dear friend, exactly – why pay if you don’t have to? A bit of googling on phantom power circuits, and voila! I found an ancient three-component circuit that would save me about 7,450 rubles. This genius circuit was based on a “NOT” logic gate and a bunch of old components from the stash.
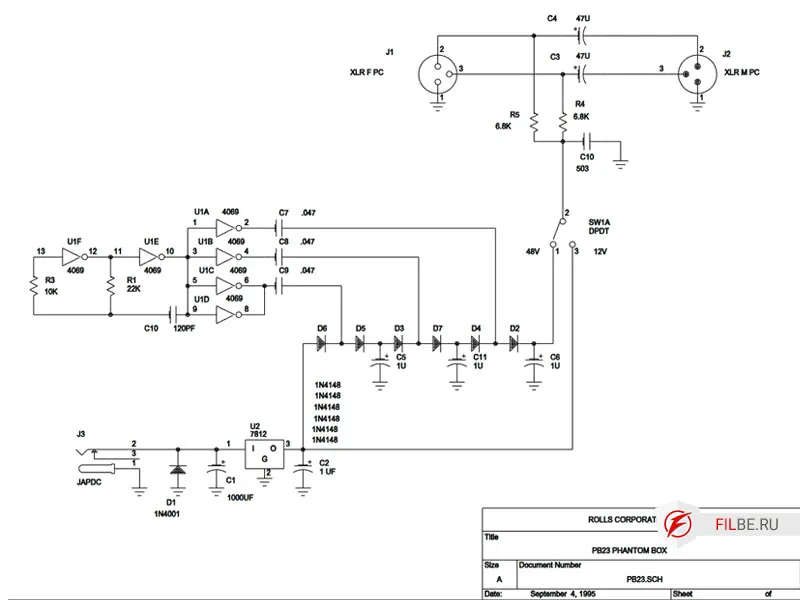
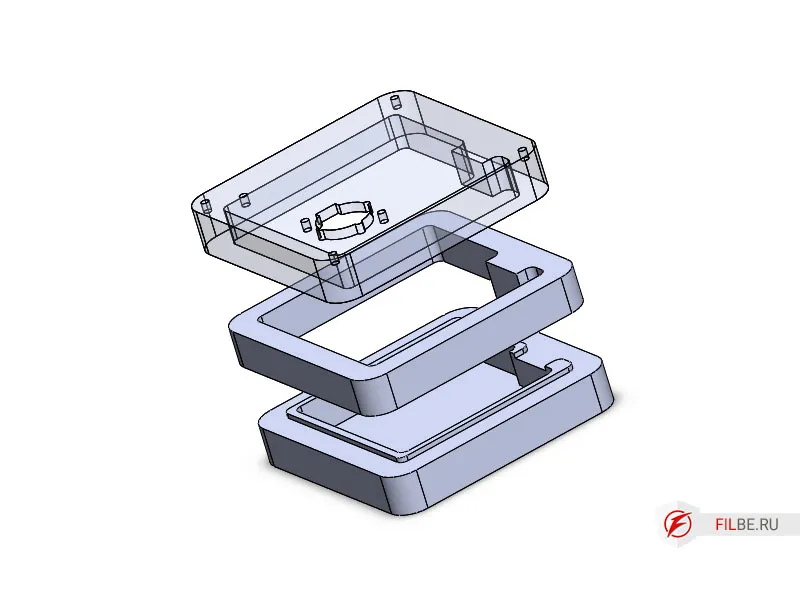
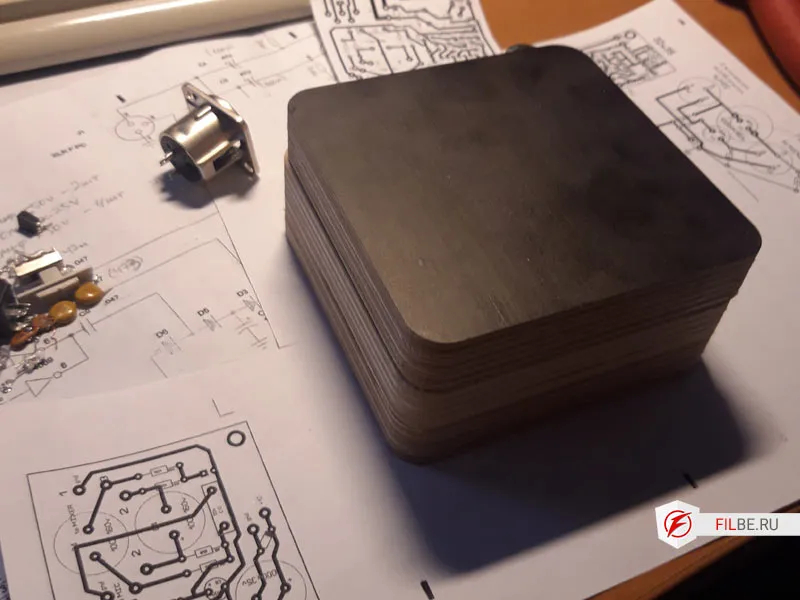
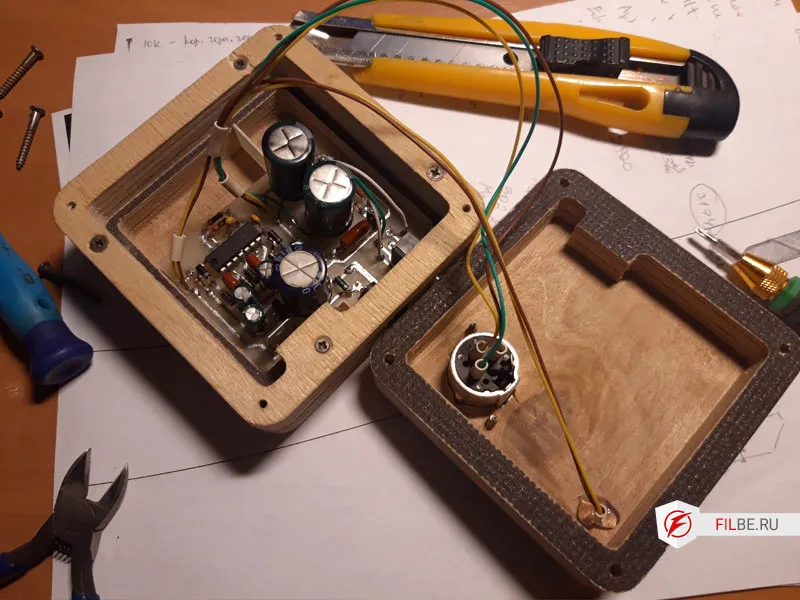
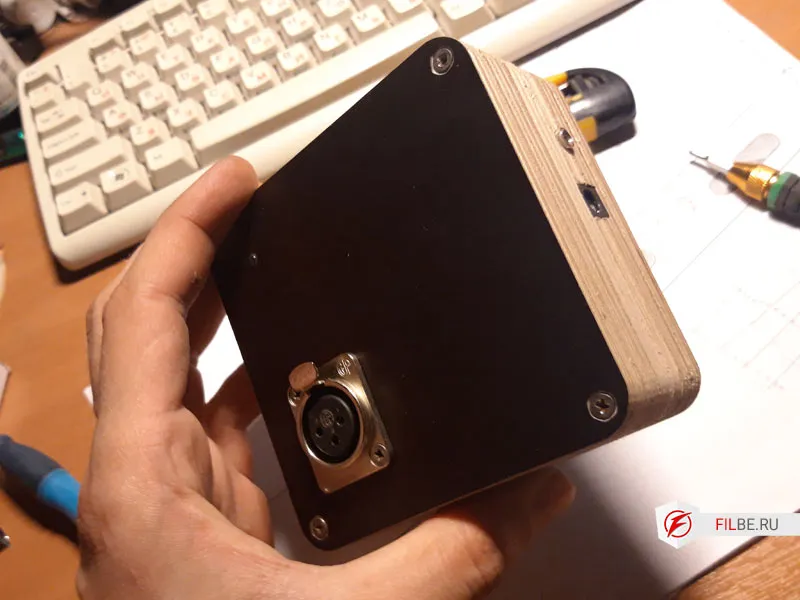
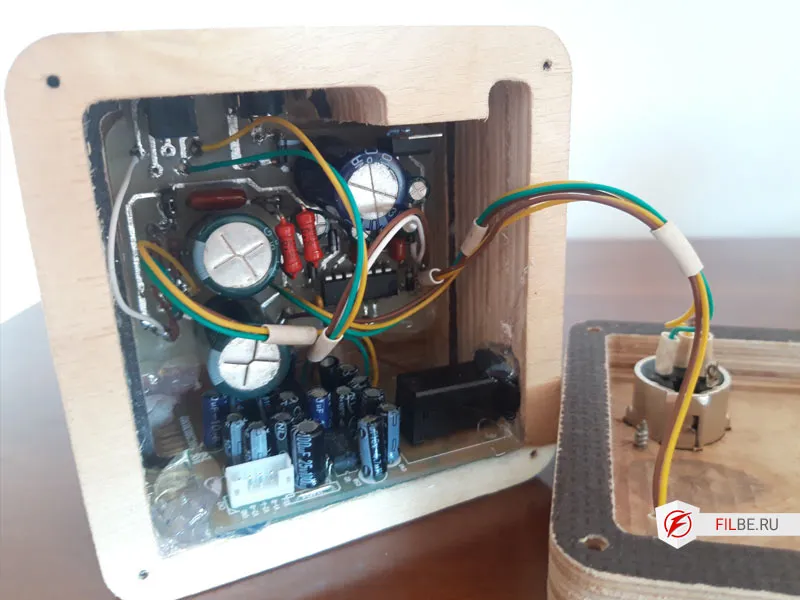
The only component I had to buy was the logic chip HEF4096U, which cost me 50 rubles with delivery. Since working without a casing wasn’t an option, I first designed the PCB for my components, then did a little magic and 3D modeled the casing, which I later made from scrap plywood.
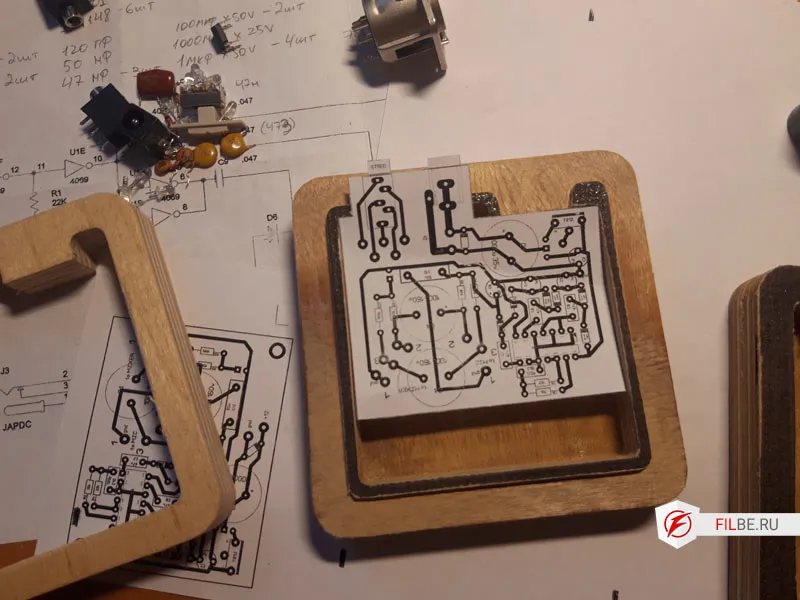
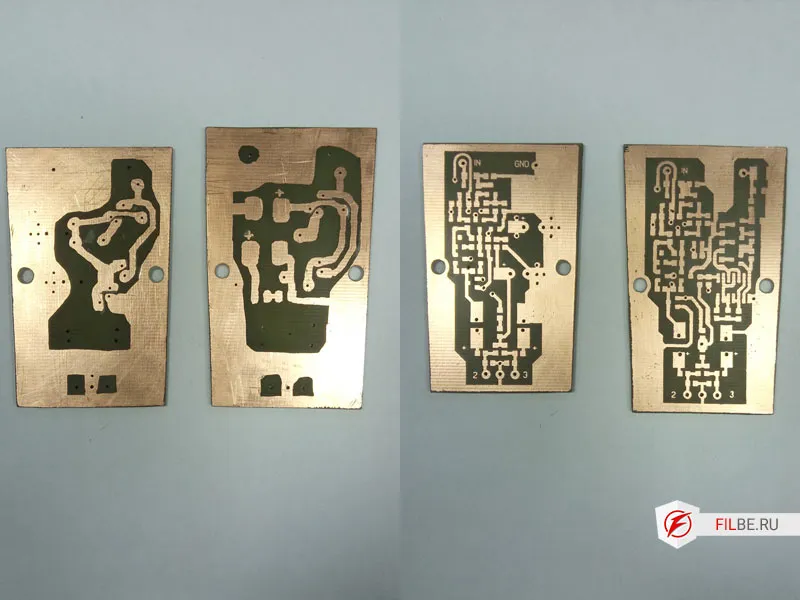
Using the secret LTK method, I transferred the circuit pattern onto the copper-clad board and placed it in a tank with ferric chloride to etch the board. After etching and washing the board, I admired the result – only it was mirrored, which I had forgotten to do! For those who don’t know, ready-to-print circuit schematics should be mirrored for the LTK method to produce the correct board.
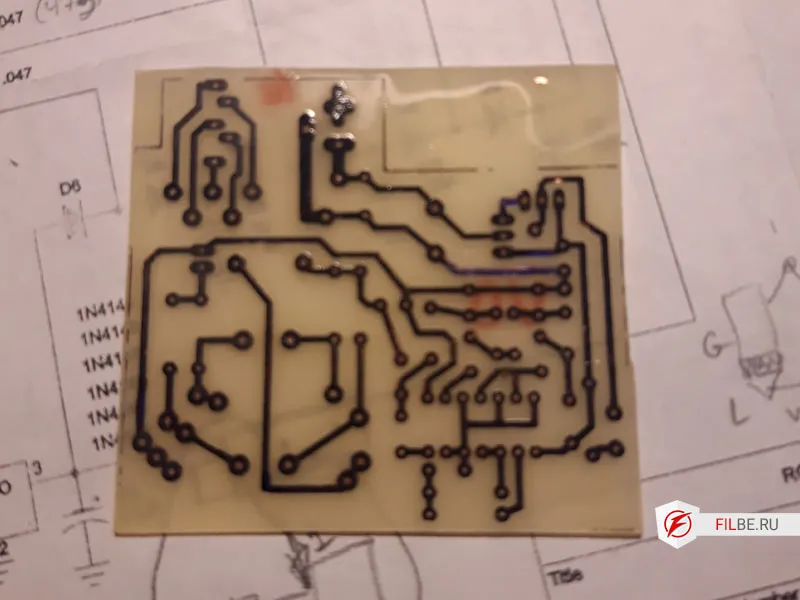
For this reason, I soldered the components on top of the board. The hardest part was soldering the big capacitors, which I had to lift to get the soldering iron to the pins. After everything was soldered, I had a nice-looking board, and it was time to attach the connectors and the little light to indicate that the 48V phantom power was working for the condenser mic and test how it works.
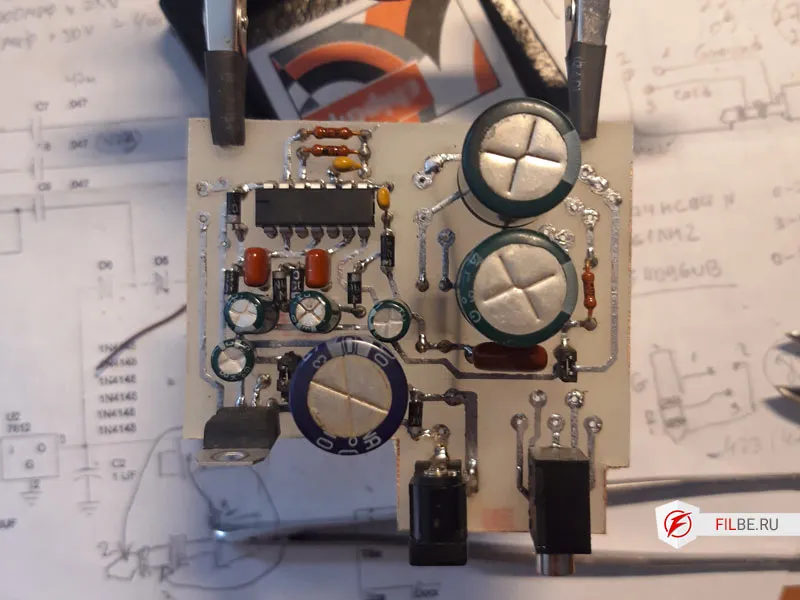
When I powered it up, I was surprised – it worked, but not as expected. There were some noises in the mic, likely from the computer’s power supply. When I used an external power supply, the noise persisted. However, when I powered it with a cordless drill battery, everything became crystal clear.
Mixer
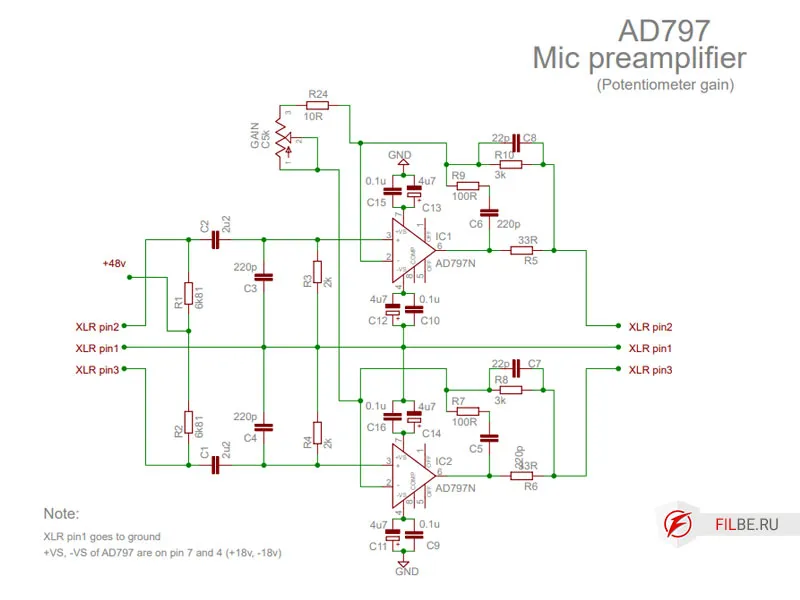
Then I thought, why not build an amplifier too? Another round of googling led me to a two-channel amplifier using the AD797 operational amplifier, which had good reviews (there are also INA103, INA163 amplifiers), but the cost of the components wasn’t favorable, so it was easier to buy a ready-made device.
Then, like in the game “Who Wants to Be a Millionaire,” I called a friend who had a broken karaoke machine, and we found an amplifier based on the 4558 operational amplifier inside.
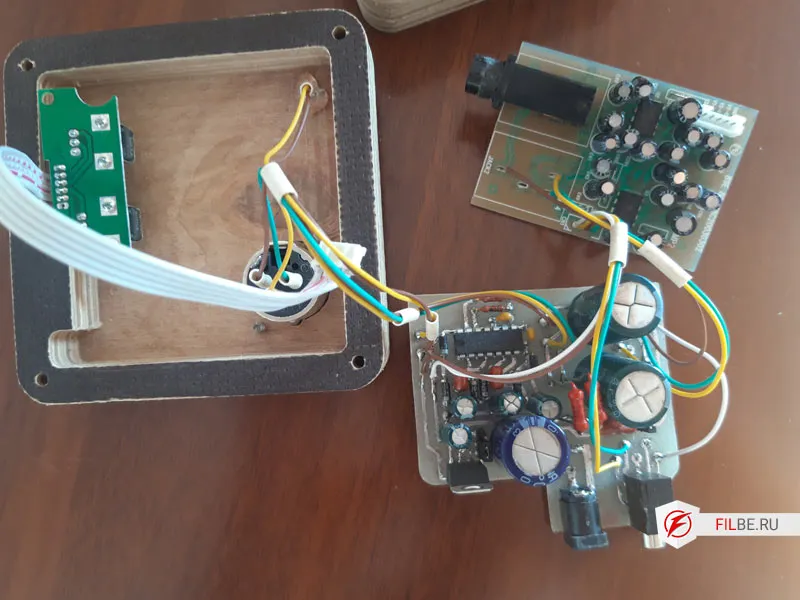
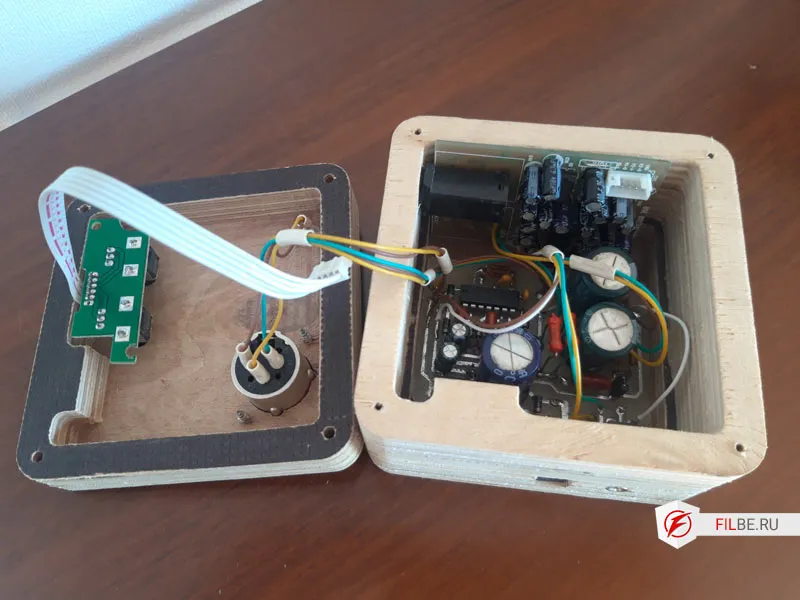
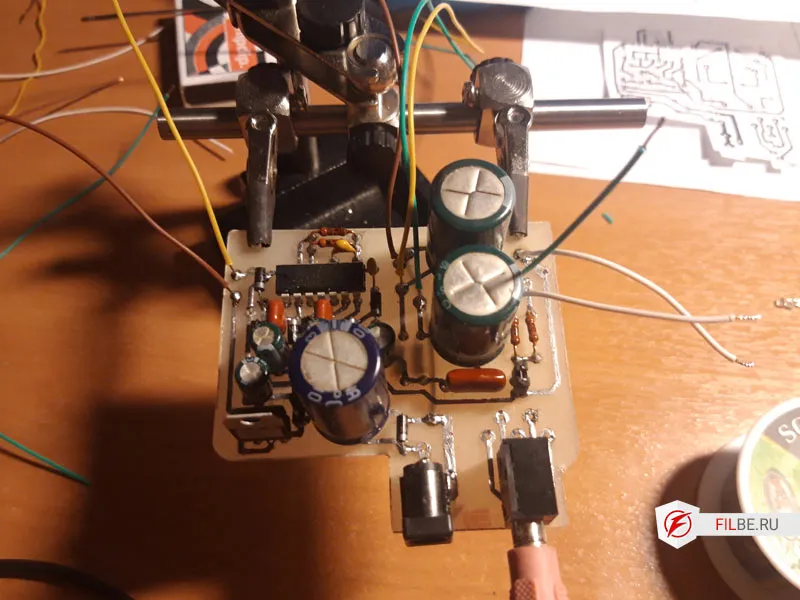
I thought it would work, and started combining the phantom power and the amplifier from the karaoke machine. It turned out pretty well – in the end, I had a two-microphone mixer, and the second microphone channel could be used for background music from a player or phone.
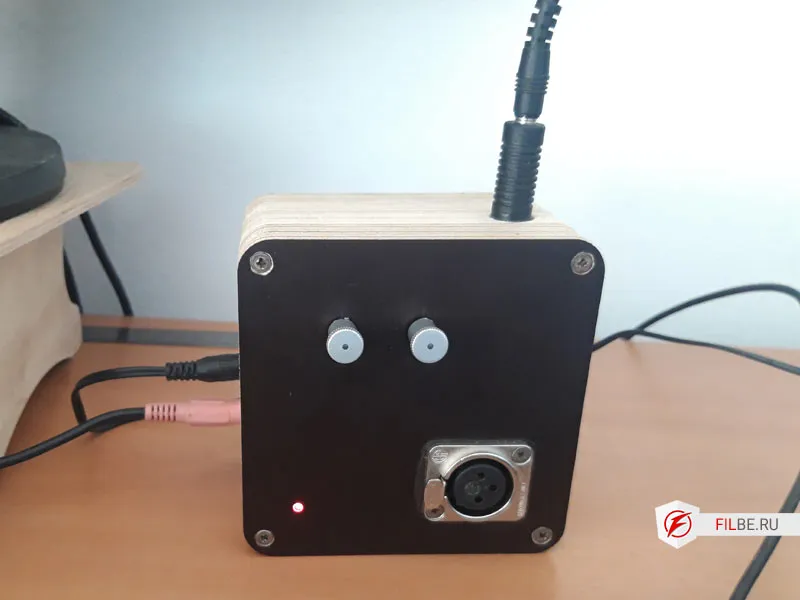
I had to add another piece of plywood to the casing, which I glued, and also rotate the lid so the XLR connector didn’t collide with the capacitors.
Conclusion
If you need to record your voice in a room or a private house, in my opinion, the best solution is to use a dynamic microphone. It won’t pick up surrounding noise. If you don’t need to connect musical instruments, then instead of an external sound card, it’s better to buy a mixer – it’s cheaper and offers more options, such as built-in compressors, etc.